Il tuo carrello è vuoto


Homemade coconut kefir (using Easy Kefir powder)


A nourishing plant-based fermented beverage.
kefir is a tangy fermented beverage traditionally made with dairy milk, but it can also be made with plant-based, milk substitutes, such as coconut milk. Like dairy-based kefir, coconut kefir supplies the gut with lots of beneficial bacteria to boost the immune system, heal the gut and reduce digestive issues. It’s a delicious and nourishing option if you avoid dairy.
Traditional kefir uses ‘kefir grains’ to culture milk. The grains are symbiotic living organisms, that contain lactic acid-producing bacteria and yeast. These microbes multiply and ferment the sugars in milk, and as long as they’re kept in fresh milk at the right temperature, they will stay reproducible indefinitely.
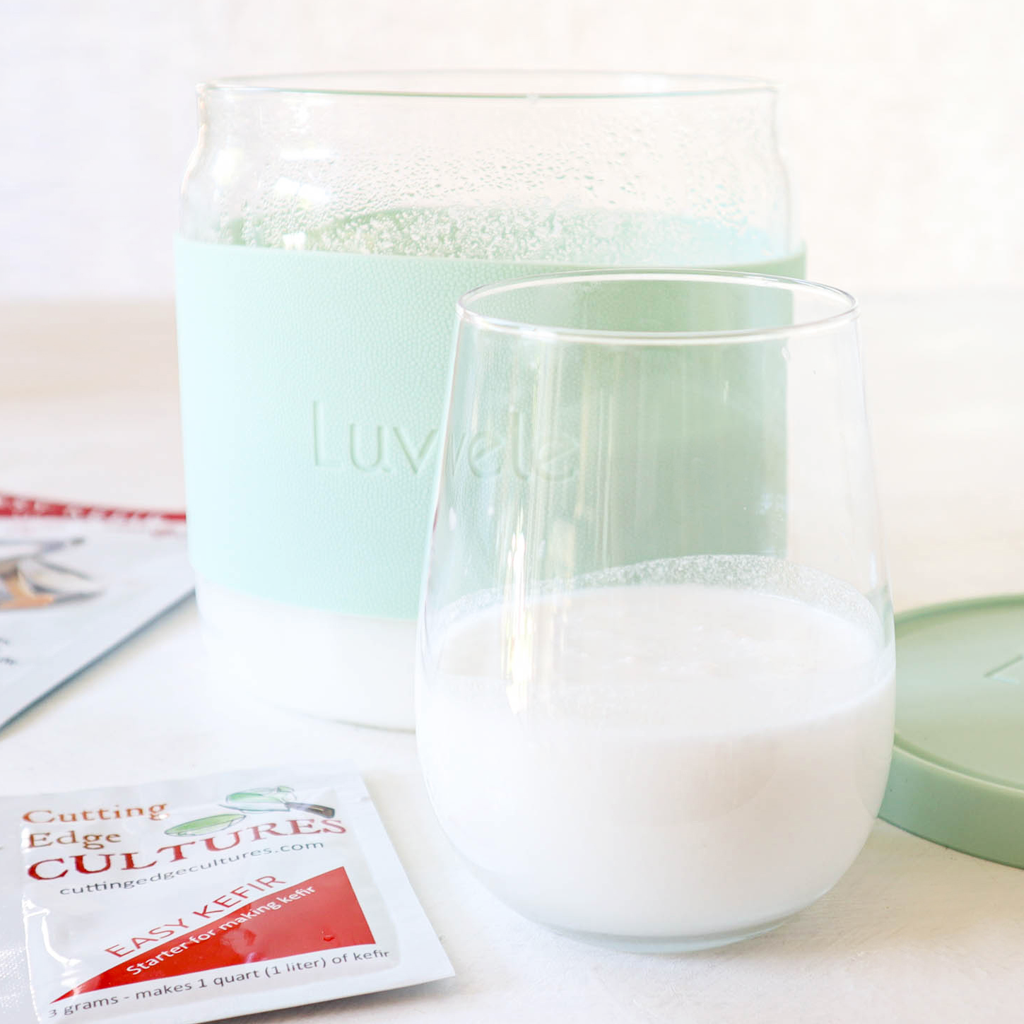
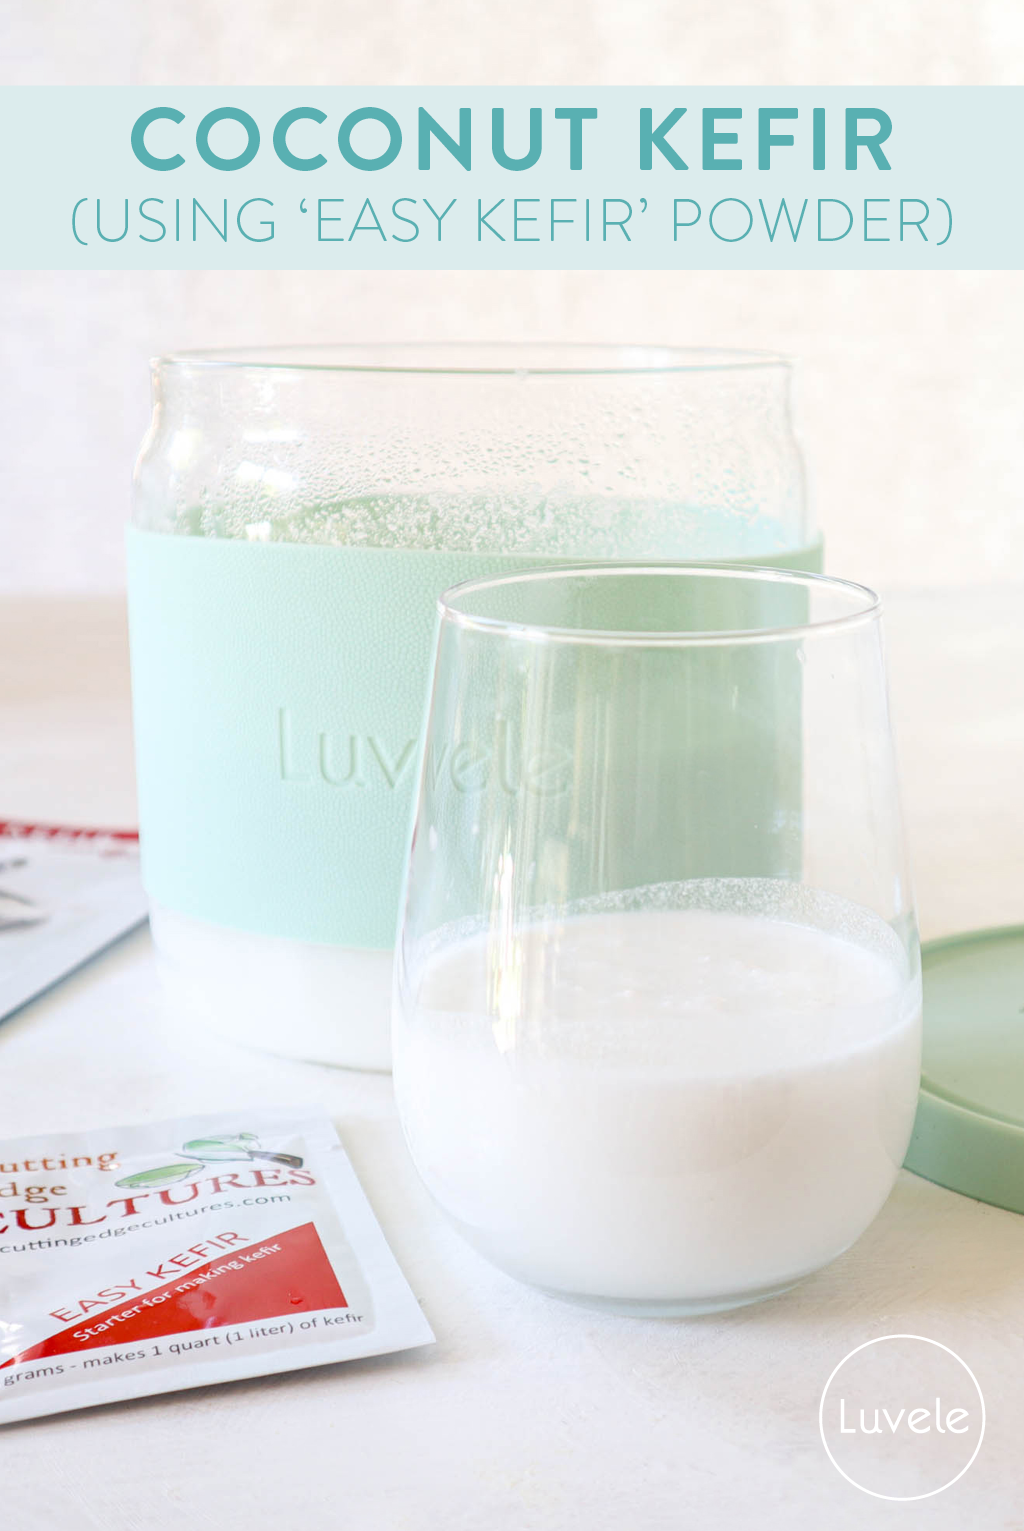
EASY KEFIR
Traditional kefir grains are difficult to separate out of homemade nut milk as the pulp and oils tends to cling to the grains. Cutting Edge Cultures have created Easy Kefir, a freeze-dried kefir powder, that looks and behaves the same as yogurt starter culture. Easy Kefir contains all the strains and yeasts present in grains, and delivers all the benefits, without forming grains at any stage during fermentation.
Vegan disclaimer: Easy Kefir is made from dairy kefir grains that have been freeze-dried and ground up into a powder. So even though there is no actual dairy in the sachet, we cannot make the claim that it is vegan because they were made from kefir grains that were once fed by dairy milk.
SUGAR
Kefir microbes need some type of sugar to consume to generate lots of probiotics. Plant-based milk doesn’t have the natural sugar available to feed the bacteria or ensure the culturing process will take place. When making coconut kefir, you will need to add a little bit of sugar. The Easy Kefir sachets also contain maltodextrin to keep the bacteria fed. Concerned? You won't get this sugar because the millions of microbes will consume it and convert it into probiotics.
COCONUT MILK
You can use homemade coconut milk or a canned variety. If using store-bought coconut milk, remember to avoid brands with additives and sweeteners, as they can interfere with the culturing process. We show you both methods, step by step, in the recipe below.
WHAT TO EXPECT
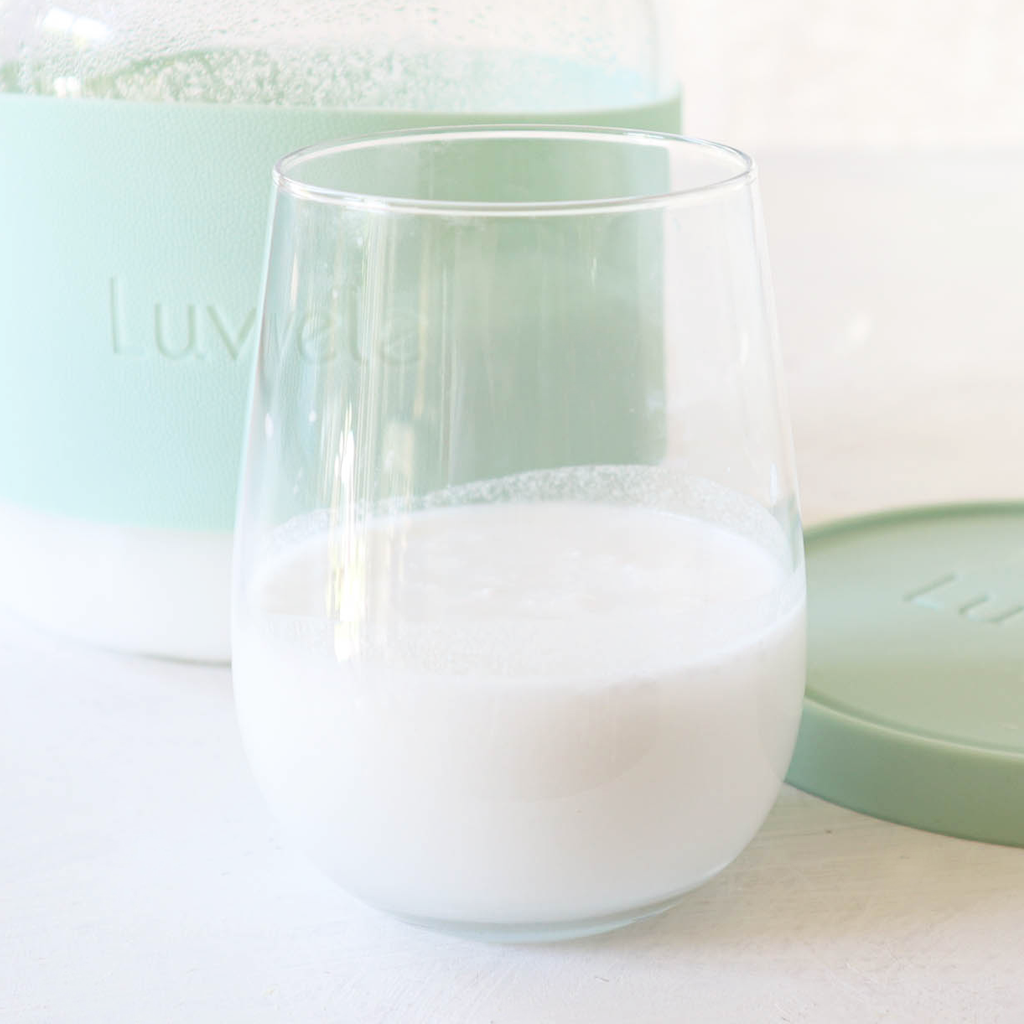
Plant-based milk kefir will not thicken so the result will be thinner than traditional dairy milk kefir. Coconut kefir will also separate into two layers, coconut milk on top and coconut water at the bottom - don’t worry, this is normal. Just stir it, pour it into a glass and drink it. It's still loaded with tons of probiotics and nutrients. Homemade coconut milk and some brands of canned coconut milk may also contain a portion of coconut oil. The oil will set hard on top of the kefir when chilled and can be lifted off.
RECULTURING
Even though Easy Kefir does not produce actual kefir grains, you can use a quarter of a cup of your homemade coconut kefir, to start a second culture, but after a couple times re-culturing, it will lose potency and need a new Easy Kefir powder sachet.
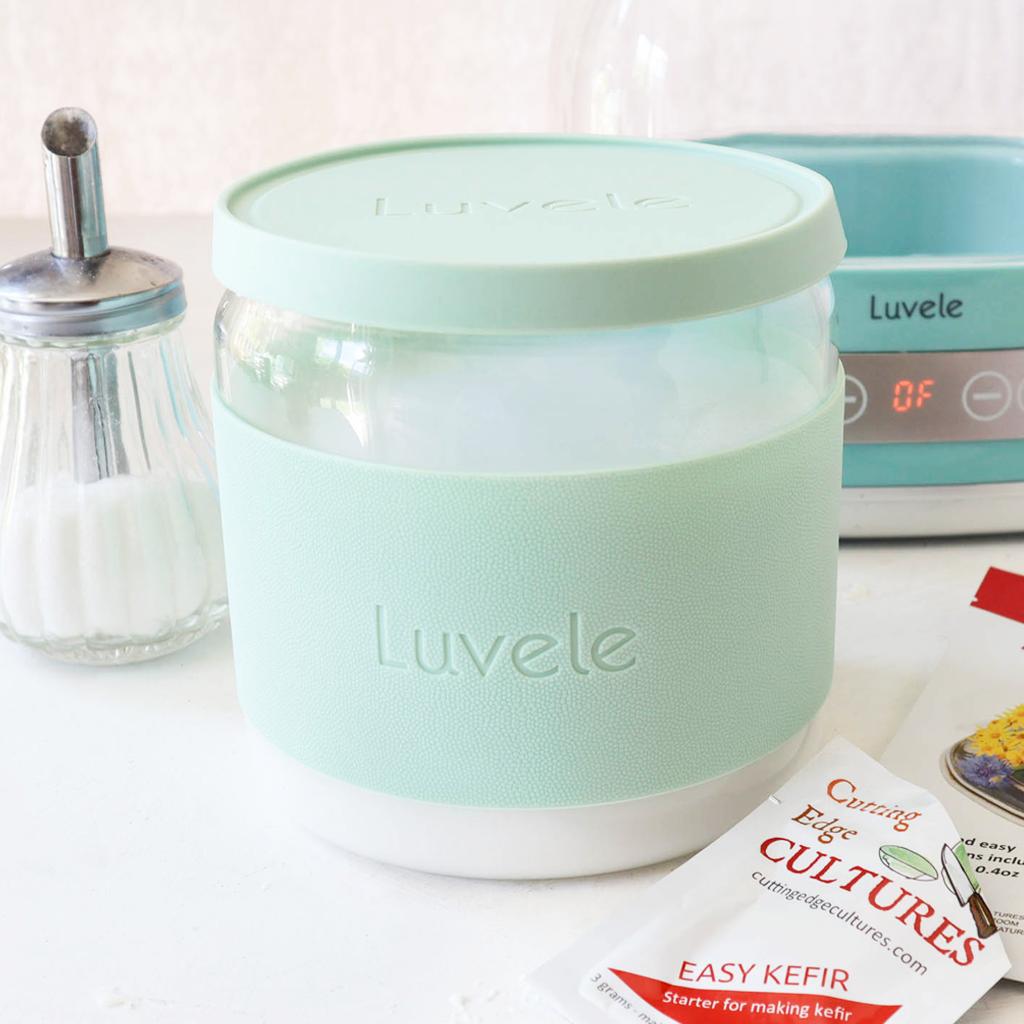
YOGURT MAKER
Kefir is ideally fermented for 24-hours at around 25°C/78°F. (room temperature) and is traditionally made without any special equipment other than a sterile glass jar left on your bench top. Incubation time is a little unpredictable. Fermentation is faster in warm weather and can have a strong, sour flavour. In cool temperatures it can take several days and result in a weak fermentation.
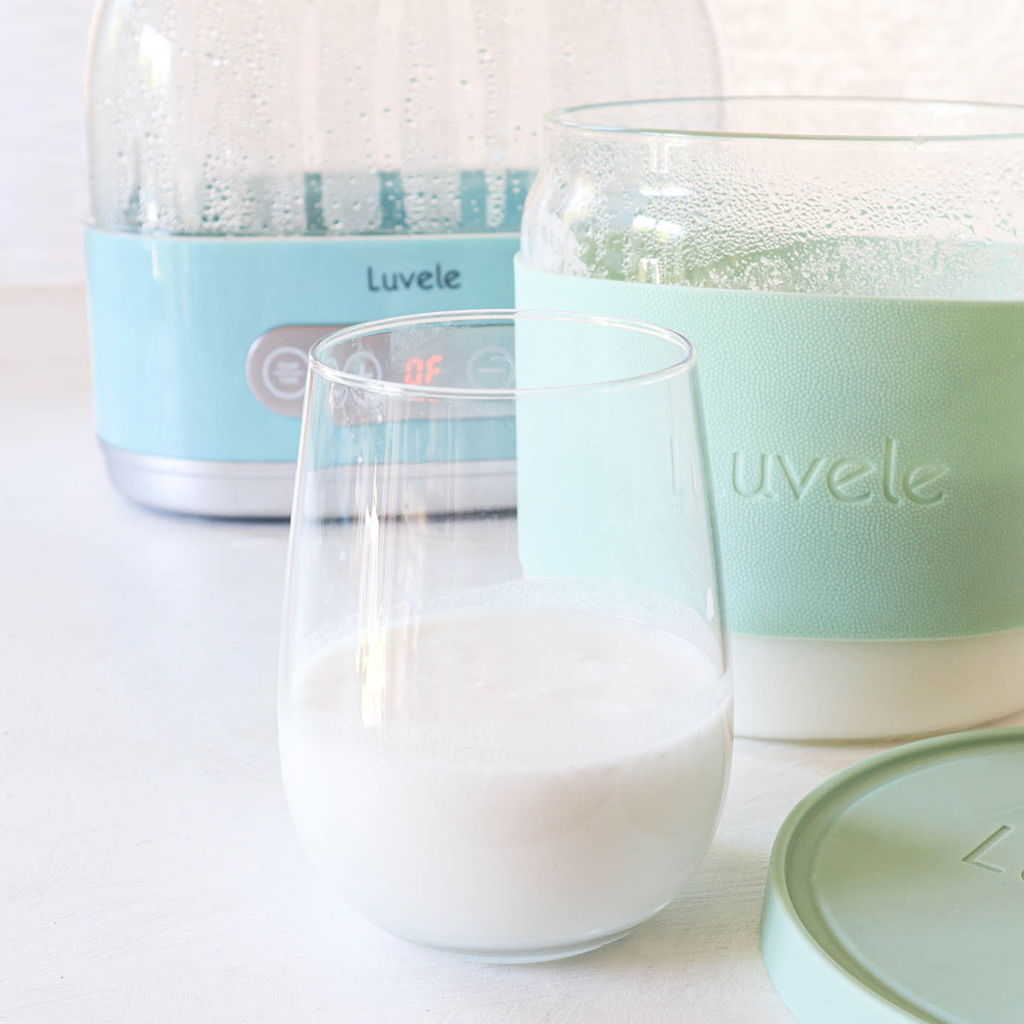
The benefits of making Kefir in a yogurt maker are plentiful. The new Luvele Yogurt Makers control the consistency of your Kefir whatever the weather. Take care, most yogurt makers are designed to maintain a temperature close to 40°C/104°F, which will kill Kefir. The new model ‘Pure Yogurt Maker’ has a broad temperature range (25°C- 50°C / 78°F - 122°F.) that can now incubate kefir and fermented foods other than yogurt.
WATCH HOW HERE
PREPARATION
Before you begin it is important to sterilise the Luvele yogurt making glass jar and any utensils you use, in boiling hot water. Do this by boiling a kettle and carefully pouring the hot water in the jar and over the equipment. The danger of not sterilising is that other bacteria may overpower your culture and affect the quality of your ferment.
INGREDIENTS
1-1.5 litres (or quarts) coconut milk
1 teaspoon of sugar
1 sachet of Easy Kefir (or ¼ cup of homemade coconut kefir from previous batch)
METHOD
Homemade coconut milk (see this post for more details)
1. Add 3 cups unsweetened shredded dry coconut and 3 cups of water to the stainless-steel Vibe blender jug.
2. Blend on ‘soup’ mode for 2-3 minutes. Add another 2 cups of water and blend briefly to combine. (The smoothness of the milk, and the fullness of flavour will depend on the power of your blender.) After blending, the texture of the coconut milk should be only ever so slightly grainy. We have used coconut milk straight from the blender (without straining). For a smooth milk, use a nut milk bag (or muslin cheesecloth) to separate the coconut flesh from the liquid. You’ll want to squeeze as hard as you can to remove the liquid.

COCONUT KEFIR
1. Pour the coconut milk into a sterile Luvele yogurt making glass jar.
2. Add sugar and one sachet of Easy Kefir then whisk until thoroughly combined.
3. Place the lid firmly on the glass yogurt jar and place into your yogurt maker. Pour water slowly into the base. (The water must not be filled over the ‘tall line’ indicated on the inside wall of the maker). Then place the cover lid on top.
4. Use the digital control panel to set the temperature to 25°C/78°F and the time to 24-hours, then press ‘confirm’ to begin incubation.
5. At the end of the fermentation, turn the yogurt maker off. Remove the cover lid and gently lift out the glass jar. Straight from the yogurt maker, the coconut kefir will be warm. Place the jar in the fridge for at least 6 hours to chill.


RECULTURING
Once you’ve made your first batch of coconut kefir, you can use some of it to make more kefir, so don’t drink it all! Simply reserve a quarter a cup of this kefir, add it to more coconut milk, with sugar, then incubate in the yogurt maker again. To avoid the growth of unhealthy bacteria we recommend starting over with a sachet of Easy Kefir as soon as you notice a change in taste.
PIN THIS RECIPE

Item is added to cart